Monday, March 18, 2013

My Design Work and My Talented Sis-In-Law

I was a busy woman the last couple of weeks. I've been working on a project that I've been excited to share with all of you!

If you don't know it already, my sister-in-law Deborah is a writer. And I'm her book designer and one of her editors. She published her first book, The Gifted, in March 2011. At the end of this month, she is publishing her sequel, The Betrayed. So without further ado, here are both book covers (and backs):


Two and a half years ago, Deborah entered The Gifted into the Amazon writing competition and made it as a finalist. She made it to the top 100 books! So you know it's good. And honestly, her sequel would have won if she had entered it into the contest this last year (but I'm pretty sure they don't accept sequels). I'm proud of her. Writing a novel is on my bucket list, but she has already written and published two!

I recommend both books to anyone who is interested in YA Fantasy. I really liked the sequel especially (which comes out in less than 2 weeks so you have time to read the first one before it does!).

To order books or to at least check out Deborah's author website, click here.

This is the kind of design I love doing. I wish that I could say I made the brushes used on the book cover, but I didn't. It's a goal of mine to learn how. But, I love designing and I enjoy editing so these two books were the projects for me! And now after who knows how many hours, I will have TWO books on my bookshelf that I have been a part of. Thank you Deborah for giving me the opportunity and for always telling me that I'm awesome. :)

Thursday, February 28, 2013

Pintest: Homemade Laundry Soap

So I resisted Pinterest for a long time. I didn't want to get into anything that would be obsessive (knowing my personal tendencies) and so I just avoided it. Then I got really sick of hearing, "Did you see the pin..." or "I got it off Pinterest." So I gave into the "dark side" as my husband likes to think of it. I'm slowly winning him over though I think, with the help of my friend Shauna.

When I first started using Pinterest and saw some people with 5,000 pins, I thought to myself, "Holy cow. I'm never going to let myself get that obsessed." It wasn't so much that I wanted to not pin things, it was that I didn't want to pin a lot of things and then not use them or even look at them ever again. I wanted to feel like Pinterest gave me more ideas that I would actually INCORPORATE into my life (so that I could justify that it was productive, right?). So my goal was to have at least 10% of my pins be ones that I accomplished and liked (under a separate board of "Pins I Will Do Again"). I was doing pretty well for awhile... but now I'm quickly becoming a hypocrite with (as of right this second) 1,519 pins and only 90 under my finished pins board. To give myself some credit though, I've tried more pins than that; the 90 are just the ones I tried and liked.

So in an attempt to motivate myself to get off my lazy pregnant duff and inspired by Jennifer at The Craft Patch (okay so I'm totally copying her), I've decided to do my own Pinterest Test Series. My posts will be either Pintests or Pinmimics (and yes I totally made up both of those words). The bonus is that if you have the same thing pinned, you can learn from my successes/failures so you do/don't have to do the same pin if it's one of your thousands!

After that super long introduction, here is my first post:

I have tried out 2 different homemade laundry detergent "recipes" from Pinterest. The first one I didn't like so much. So you can imagine my hubby's surprise when he came home one day and I'd made another homemade laundry detergent. :) What can I say, I'm persistent about trying to be frugal.

So here are the two I tried (there are a lot more recipes out there):

DYI Laundry Soap
Easy Homemade Laundry Detergent Recipe

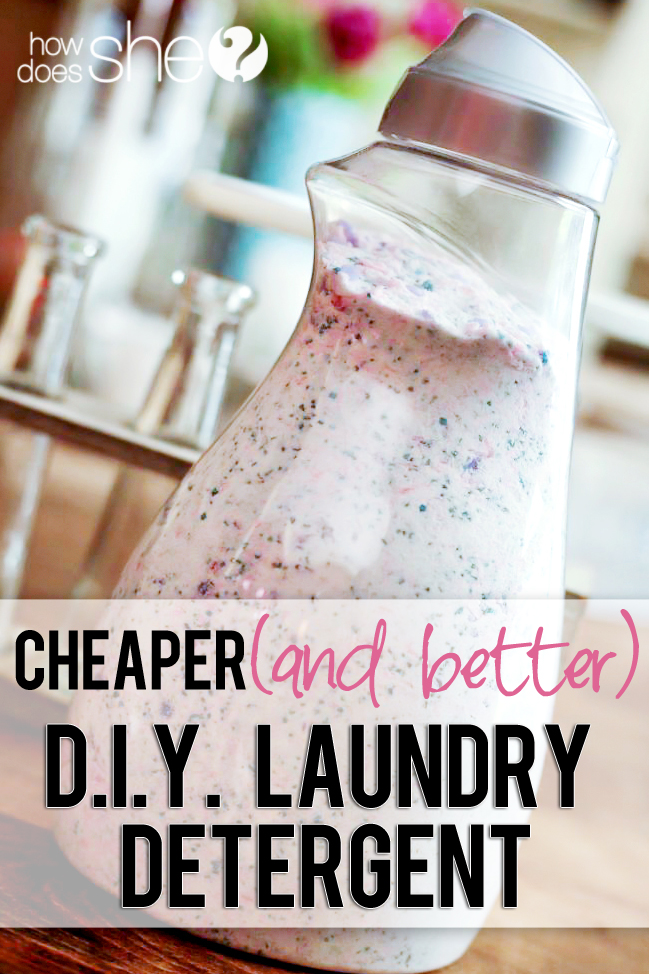
Now if you look at the two pins, these are almost the same recipes. But I feel like for me, the How Does She tutorial wins.

The first thing you have to remember is that neither of these detergents are "sud" detergents. Meaning, the water doesn't get all bubbly when it hits this soap so you wonder if there's something wrong. But did you know that non-sudsy soap is better for your washer? And because these don't sud, you can use them in place of HE detergents.

That was the first thing I had to get used to. The reason I stopped making the first detergent? Because I felt like it did the job, but I missed the good-smell of store-bought laundry detergents. It wasn't as if our clothes smelled bad, they just didn't smell like anything. And let's be honest, the only rewarding part of laundry is pulling out those clothes from the dryer and smelling that wonderful clean-laundry smell.

So that is why when I found the How Does She tutorial and saw that it called for Purex fabric softener crystals which smell really good (and actually help clean your clothes), I decided to try it again. And I feel like it is not only cheaper and better for my washer, but also pleases my nose as well. Besides, I agree with her friend that it looks super cute in the Purex container, which is important to me since I don't have any closed shelving in my laundry room.

The only tip I have that she doesn't mention in the tutorial (I think) is this: Mix it in the bucket outside. I did this in my kitchen and it stunk up my kitchen for 2 days. And not in a pleasant laundry smell, but an overpowering aroma.

As you look at the tutorial, you'll most likely wonder the same thing as I did: How in the heavens did she have enough patience to hand grate those bars of Zote (I used Fels Naptha instead by the way). I have no clue, but I'm lucky enough to have a food processor (one of the necessities for me when I make my own spaghetti/salsa to can). I hope you have one too if you want to try this!

Wednesday, February 20, 2013

Ramblings of an Imperfect Mother

(Disclaimer: I fully recognize that I have a wonderful child who I love and cherish. I would never give up being his mom for anything. Nor can anything compare with his unconditional love for me. But in my quest to keep things real on this blog, I must say the following is true.)


Being a mom can be hard. There are days where you think there is nothing else you'd rather be doing. And then there are days where you think, "I need to get the heck out of here." And I only have one child so far. I like to think that my patience capacity is just going to magically expand with each child I have because then I won't go completely out of my mind on the hard days. Please no one burst my bubble.

It would be easier if children came with a handbook. "Turn to page 14 for temper tantrums. If these ideas don't work, turn to page 18 for ideas of where you can hide before you throw a tantrum of your own."

But they don't. And really, each child is uniquely their own. What works for one, may not work for another. So you feel like you're reinventing the wheel with each child. Sometimes, it's just so refreshing to see another mother say "I have no clue what I'm doing, but this is what Heavenly Father wants me to do and I sure love my kids deep down inside."

Sometimes the only way to keep cool is to have some humor. One of my favorite mothering memories is when a friend at church had her sobbing daughter next to her, whining about one thing or another and my friend said to her, "Child, let's go find your mother." (Janelle, you always crack me up.) Sometimes you've got to laugh or otherwise you'll cry.

I don't think I've ever met a mom who isn't hard on herself or isn't thinking that she's failing as a mother in one way or another. It doesn't help when you get negative reinforcement from your kids yelling, "You're a bad mom!" or "I don't love you anymore!" every time they're upset. (My 4-year-old does both without ever being taught it). Or when you have other moms laud their superior mothering techniques or tell you what would work better for you and your child (as if they know your child better than you do). Bottom line is even those women are thinking that they'll never reach the lofty "good mom" status.

And this is why I laughed at this quote from Pinterest:

 How true is this?

What's a "good mom" anyways? I can bet that each mother's description is vastly different from the next and full of reasons why they do not fit this "good mom" category. We look at the next woman over who's sitting there in church, her children quietly paying attention to the speaker and you think, "Now there's a good mom." What you don't know is that she totally had a breakdown the day before because her 2-year-old pooped in the corner and then smeared it all over the wall, her 6-year-old cut his own hair, she yelled at her 9-year-old when he broke her favorite vase playing soccer inside, she burned dinner cleaning up the aforementioned calamities, and then she forgot to pick up her 12-year-old from a birthday party and the neighbor had to bring her home.

The worst thing you can do is compare yourself to the other moms around you. I promise you that it doesn't make you feel any better because you don't know what their life is truly like and besides, you're always comparing your weaknesses to their strengths. So when I'm at my wits end and I'm feeling like the worst mother in the world, I have to remind myself of this:


I am enough for my children. I am doing the best I can and that's all that's asked of me. I am doing the most important thing a woman can do in this world. And Heavenly Father will help me because they're His children too.

Now if only I could remember all of that when the going gets tough and I wonder, "What have I got myself into?"

Sunday, February 17, 2013

Heavenly Father is Real

I love the following video from Mormon Messages. It shares the message of fatherhood -- fathers on earth and our Heavenly Father. I know that there is a God and that He is our Father. I know this because I have felt His love as I've experienced life.


Thank heavens for fathers who give so much and I am especially grateful for a Father in Heaven who has given me all that I have. And I know that I'm a daughter of God who can inherit all that He has if I stay faithful and endure to the end.

Tuesday, February 12, 2013

Freezer Meals That Work

So in the past year, I have become a huge fan of freezer meals. Not only do I love the concept of having a meal on hand on those days I do NOT feel like cooking, but I also love that if I'm ever called upon to take a meal to someone it doesn't stress me out because I know I always have at least one meal in my freezer that I just have to cook.

However, I'm not a huge fan of a lot of the freezer meal recipes. Mostly because they are things my family would never eat. So slowly I've been finding recipes that we like that are freezable. Here are a few of our favorite freezer meal recipes and a few things I've learned along the way:


Baked Chicken Taquitos (Our Best Bites) -- Our Ultimate Favorite!

Oh my heavens, we could eat these taquitos once a week! I have made them countless times and they never get boring. Besides being so easy to make, I love how when you pull them out of your freezer they only take 25 minutes to cook, where most of my other freezer meals take almost an hour. I also double the batch and then freeze them in bags of how many we'll eat in one meal. So I usually get at least 3 meals out of it for our family of three (and my 4-year-old eats TWO without complaint!). Everyone who has had them (and believe me, I've fed a lot of people these) have liked them. You can always count on Our Best Bites.

To find the recipe, click here.


Freezer Meal Tip #1:
Don't freeze cooked potatoes. When you thaw and re-cook them they will be very very mushy. But if the potatoes aren't the main part to the meal, you can add them almost cooked to the recipe when you pull it out to re-heat it (I'm thinking of soups here). But since I like the idea of just dumping the meal in the crockpot or putting it in the oven, I just don't do potato freezer meals.


Tomato-Basil Parmesan Soup (365 Days of Crockpot)

Pinned Image
Photo credit: inthekitchenandonthecouch.blogspot.com

So I have to start out by saying that my husband doesn't like parmesan-y things and I don't like tomato soup, but we BOTH like this recipe. This recipe is SO incredibly easy (can you tell I'm a lazy cook?), especially if you cook it in the crockpot, let it cool and then freeze it to warm up when you want to eat it another day. What I usually do is make the full batch and have half for dinner that night and freeze the rest. I've made it with 1% milk or half-and-half and I would suggest using whatever you prefer (or have on hand!). It doesn't make that much of a difference. I would suggest that when you warm up the freezer soup that you add a little milk to it when it's reheating. Otherwise it is kind of watery. Also, I use the Parmesan cheese in a can and I only put in 1/2 cup.

To find this recipe, go here.


Freezer Meal Tip #2:
Always write the date of when you made the meal, the name of the meal, and the cooking instructions on the foil or bag. Then if it gets shoved in the back of your freezer, you will still know what it is and whether it's still good. As a general rule of thumb, freezer meals are good for a couple of months.


Baked Ziti/Penne (My sister-in-law DeAnn)

This one was not written as a freezer meal, but I took a chance and found out that it tastes just the same. This is a nice variation of spaghetti/lasagna and my husband has loved this dish ever since his sister-in-law made it for him ages ago. This recipe makes a TON of food, so I usually split it up into two meals. We also can our own spaghetti sauce, so that is why it's listed in pints. Here's the recipe:
Sorry I have a crappy camera. I promise it looks appetizing.

1 lb. ziti or penne pasta
1 small onion, diced
1 lb. ground beef
3 pints spaghetti sauce
8 slices provolone cheese
1.5 cups sour cream
6 oz. mozzarella cheese, grated
2 Tbsp. parmesan cheese, grated
     OR a handful of fresh shredded
     parmesan cheese


Cook the ground beef with the onion. Drain any excess grease. Cook the pasta and drain. Add spaghetti sauce to beef mixture and simmer for 10 minutes. Using the end of a cube of margarine (or cooking spray for me), lightly grease the bottom of two pans: an 8 x 11 and an 8x8. Divide the following instructions between both pans:

Pour in half of the pasta and spread evenly. Add the provolone cheese (the slices will overlap a bit). Spread the sour cream across provolone cheese. Pour in half of the spaghetti sauce and spread evenly across the pan. Add the rest of the pasta. Sprinkle the mozzarella cheese across the pasta. Layer the rest of the spaghetti sauce and then sprinkle on the parmesan cheese. Bake at 350 for 30-45 minutes or until hot and bubbling.

IF FREEZING: Instead of cooking, put tin foil over it and freeze with these instructions written on it: Thaw and bake at 350 for 1 hour, until hot and bubbling in the middle.


Freezer Meal Tip #3:
Store-bought breads freeze and then thaw very well. It doesn't matter if they're wheat or white. I buy the hoagie-type rolls that come in a big bag from Sams or Costco and then freeze them in smaller quantities in gallon ziplock bags with the date of when I bought them written on the front. I pull out 3 of them at a time to slice in half with butter and garlic salt as our french bread to go with the Baked Penne recipe above.


Crockpot Cantonese Sweet & Sour Chicken (Food.com)
 
crockpot chicken sweet and sour done
Photo Credit: http://eatathomecooks.com

Another super easy one and it cooks in the crockpot too when you pull it out of the freezer. Not as good as some of the sweet and sour chicken I've made, but I'll take it over standing in front of the stove on a hot summer day. If you're going to freeze it, just cut all the vegetables and chicken, and mix into a gallon ziplock bag with the sauce. But freeze the drained pineapple SEPARATELY in a quart ziplock bag. You don't want to add the pineapple to the crockpot until the last hour.

To find this recipe, click here.


Freezer Meal Tip #4:
When freezing ziplock bags, put a cookie sheet under it while it freezes. Believe me, you'll thank me later when the bag you thought was sealed tightly, really wasn't.

Friday, January 25, 2013

10 Things I've Learned From Kids' Television

1) No parents in the world have as much patience and calm as Cailou's parents, especially for such a whiny, horrible child.
2) Dora's parents should be ashamed of themselves for letting her go off on adventures ALONE.
3) Bob the Builder can build anything in a day.
4) Using adult voices for kid voices is SO not okay, Fireman Sam.
5) Yo Gabba Gabba has some weird power over children even though it's simply psycho... maybe it's a form of brain washing?
6) Ornithomimus is the fastest dinosaur that ever lived. Thank you, Dinosaur Train.
7) Thomas the Train never learns and always causes "confusion and delay."
8) That completely wordless animated penguins are nevertheless entertaining to my kid and very very annoying to adults. I detest you Pingu.
9) Penguins are blue, Ladybugs are pink, Hippos are yellow, Moose are orange, and Kangaroos are purple. If you don't believe me, check out The Backyardigans.
10) The girl cow was the worst addition to Mickey Mouse Clubhouse EVER.


I never knew that children television could be so educational for an adult.

Friday, January 4, 2013

One of my Favorite Things

So when we moved into our home, there was no place next to the sink to put a towel. No bar or hook, nothing. And since my husband refused to put any holes in our beautiful cabinets, I had to come up with a different solution.

Thankfully my sister introduced me to Command Hooks. If you  haven't heard of them before, they are hooks that you can attach to almost anything that goes on with a sticky strip. You can buy them in varying size/color/weight capability. And they're easy to put up and take down, without damaging the surface you put it on!


Problem solved!
 And they can sustain a lot of weight. My next use for these handy hooks was on another side of my cabinets. I put my magnet board on it with my calendar and appt cards or invitations. This has been up for over a year and hasn't fallen once. They're pretty darn strong.


 Let me give you a quick tutorial so you can see how easy they are:

 When you buy them, they come with the command strips, a backing for the hook, and then the hook itself. The strip is sticky on both sides. You peel off the red side and stick it to the back of the backing (haha) for the hook (making sure to have the tab of the strip on the same end as the ledge that the hook sits on.


Then when you've decided where to put your hook, peel off the wall side and stick to the wall, holding it in place for at least 10 seconds to adhere.


Then you slide your hook down onto the ledge. It's as easy as that. Then if you ever get sick of it or want to move the hook all you do is take the hook off and then pull down on the tab slowly like so:

And then it comes off! You can buy replacement strips to re-hang the hooks at Wal-Mart or Target or wherever you bought your hook. They're relatively inexpensive in my opinion.

And like I said they have them in all sizes! I bought these little ones for my Christmas stockings. We don't have a mantel or anything and up until now I'd been using little pins to hang them up on the wall (which makes my husband cringe). So to hang them on the wall, I used my handy dandy little Command hooks!


Then after Christmas, I just take the hooks down and use them again next year.

And the last place I've used them: in my entryway closet. I got sick of my little boy throwing his coat on the floor in the closet because he couldn't reach to hang it up. So I put up one of the hooks at his height so he can hang it up and get it himself! It's been perfect!


So go check them out! I love them and will continue to use them in places where I don't want to drill into the wall or if I don't want the hook there permanently. It's a great solution!